


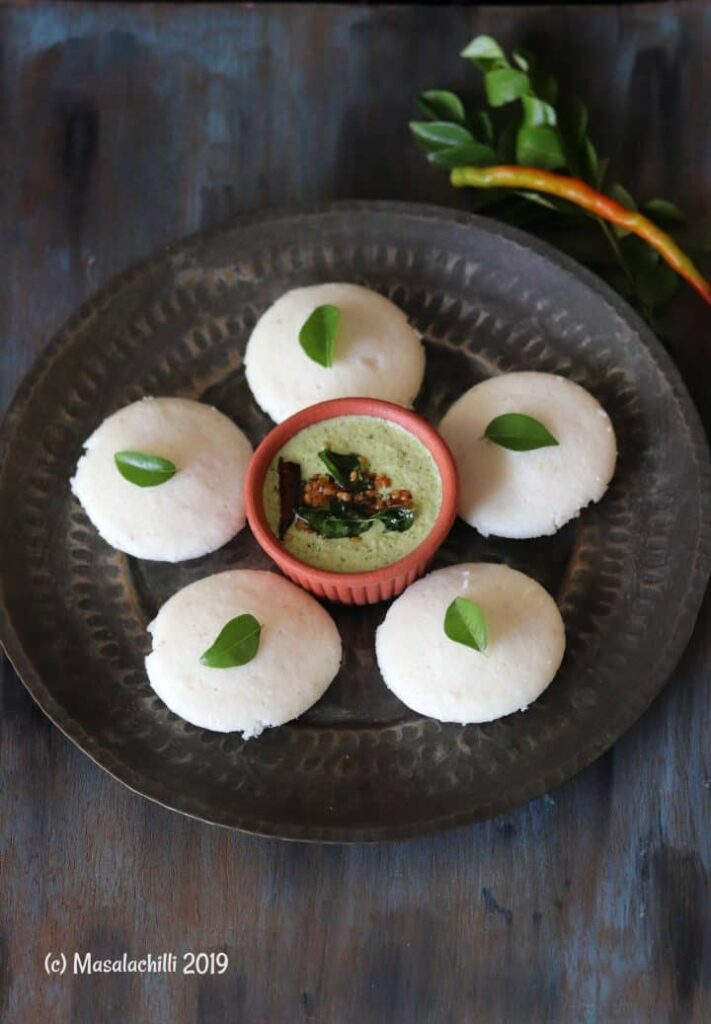
Do you love the most popular traditional South Indian Breakfast Recipe – Idli? Are you not satisfied with the softness of idlis steamed at home? Do the idlis turn hard? Well today, I have taken the time out to update an old recipe on the blog with step by step pictures on how to make super soft idlis at home without any poha or baking soda. Yes you can steam soft idlis at home and that too without the traditional stone grinder. I have made this maavu or idli batter in a mixer grinder. Have I caught your attention? Scroll through the detailed post below.
Usually with idlis there are common issues of the batter not rising or fermenting well and many feel that not having a traditional stone grinder affects the texture and softness of idlis too. Well, the post is specifically targeted to answer all the questions and your patience is expected to fully go through the post to churn out fabulously "soft as cotton" Idlis at home which your family will love to bits.
As a South Indian, we have grown up eating idlis almost everyday for breakfast. There was never a dearth of batter at home. In fact, my mother always ensured 2 types of batter – Dosa and Idli in the refrigerator. It is mandatory to be offered Filter Kaapi and Idlis when you visit a South Indian Home and ours was no different. Guests, family and friends all savoured this traditional South Indian breakfast.

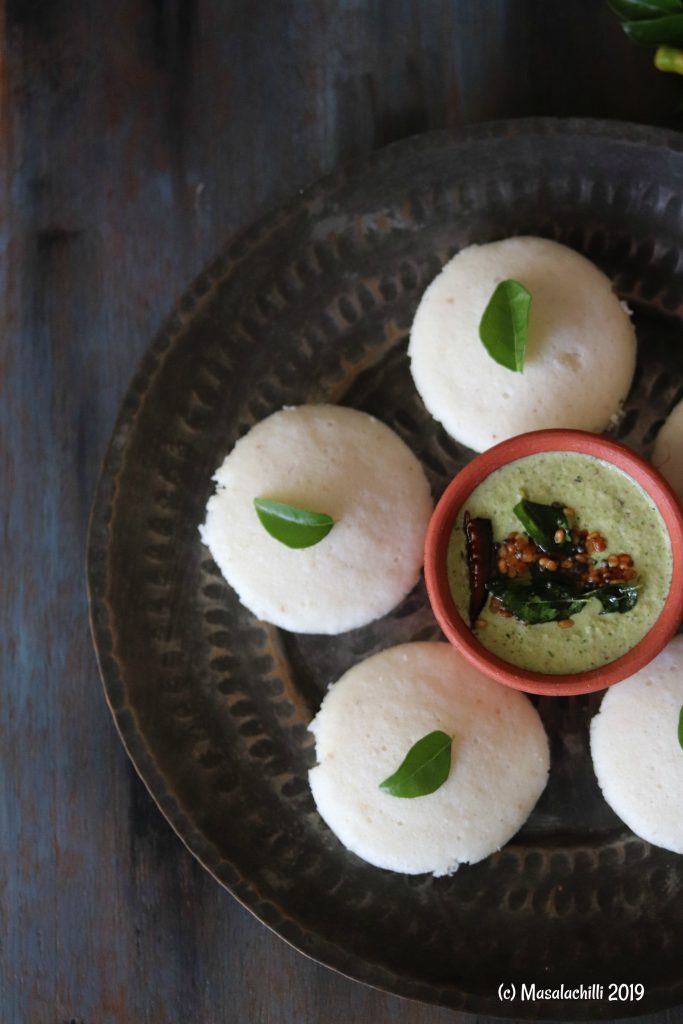
My friends visiting home always expect Idlis and chutney. They often comment how soft the idlis are and how great they taste too. I have shared the recipe of Idli batter or Idli Maavu with many of my friends and they have all given me fantastic feedback and so I thought of updating this old recipe of Idli on the blog with step by step images for ease in preparation and understanding.
The Idli Recipe on the blog was published in the year 2017 when I had just started blogging. The post did not have step by step recipes. I have updated the cover pic and the text accordingly.
I have also made this post specifically with pictorial details as I always keep getting asked for exact proportions, how to ferment etc so I thought a detailed post would help even a novice in successfully dishing out Idlis for the entire family.
What is Idli?
Steamed cakes from the South Indian Cuisine. Recently the World celebrated “Idli Day” and it rightly deserves the celebration and acknowledgement of being the “Best Breakfast” or “Healthy Breakfast” title. Idli is recommended to all age groups. It is a fermented food that is extremely beneficial for the gut.
Idlis are made using the combination of Dal and Rice. The lentils are soaked, ground and kept for fermentation overnight. The next day, they are steamed and consumed with either a sambar (lentil vegetable stew), chutney and/or Molagapodi (the spiced south Indian powder).


How is Idli Batter Prepared at home? Idli Maavu Proportion?
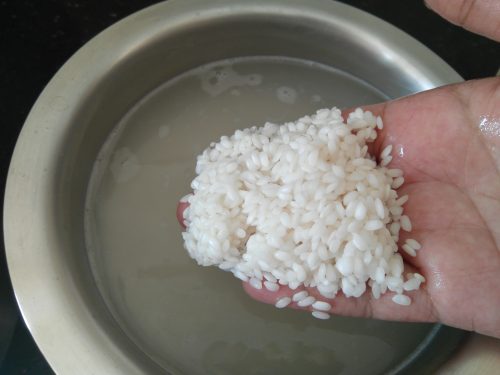
- Idli batter needs 3 ingredients only besides seasoning and water. They are Idli Rice, Raw Rice and Urad Dal.
- I go with the proportion of 3:1 (Three Parts Rice to 1 Part Urad Dal)
- Idli Rice is also Called Ponni Idli Rice which is available online and in most South Indian Grocery stores.
- Ponni Idli Rice is one of the best varieties of rice for idlis. Have been using this since years together with excellent results every single time.
- You can also opt for Ukda Chawal, Parboiled Rice, Pulungal Arisi in the absence of Ponni Idli Rice. Add same proportion.
- Raw Rice and methi seeds adds softness and reduces density making the idlis featherlite.
- Raw Rice refers to any short grain rice variety i.e. Sona Masuri, Kolam etc. Except Basmati Rice, you can use any short grain variety available at home.
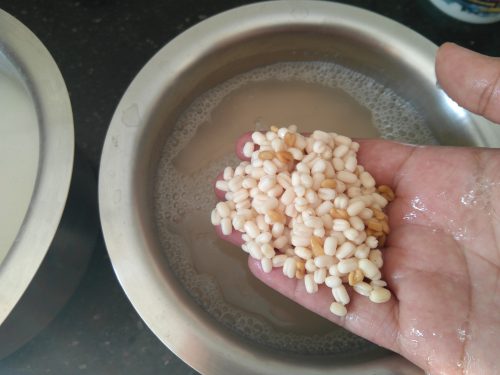
- As you can see from the pictures I have used Whole Urad Dal. You can use tukda / split urad dal too. Add methi seeds to Urad Dal while soaking.
- Water is used for soaking the dal and the rice separately for a couple of hours and then further for grinding and adjusting the batter consistency too.
Note – I have ground the batter in a normal mixer grinder (700 volts) with the exact same results.

Fermenting the Idli Batter
Once you have the soaked the ingredients for Idli and have ground them into a smooth batter, you now reach the most crucial step which is the make or break part of Idli making process.
I am often bombarded with questions on “how my idlis didn’t rise while steaming” or “why my idlis develop cracks while steaming” or “why my batter tastes bitter after fermentation?” or “Even after 12 hours my batter has not risen”
Read below to understand “How to Ferment the Idli Batter successfully?”
Steps to follow In case you want to make Idlis for breakfast
- Soak the ingredients in the afternoon for atleast 4 to 5 hours.
- Grind in the evening and keep it in a warm place overnight.
- Cover it with a warm damp cloth.
- The next morning, the batter would have risen, mix well, add salt and water if required to adjust consistency and make idlis.
- Store the remaining batter in the refrigerator.
Steps to follow In case you want to make Idlis for dinner / Evening Tiffin as in South India
- Soak the ingredients previous day overnight.
- Grind in the morning and keep it in a warm place.
- Cover it with a warm damp cloth.
- The batter would rise by evening. Mix well, add salt and water if required to adjust consistency and make idlis.
- Store the remaining batter in the refrigerator.
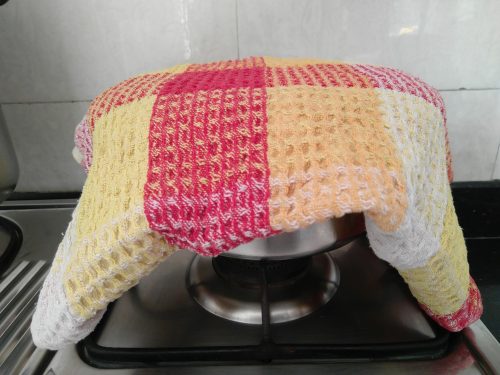
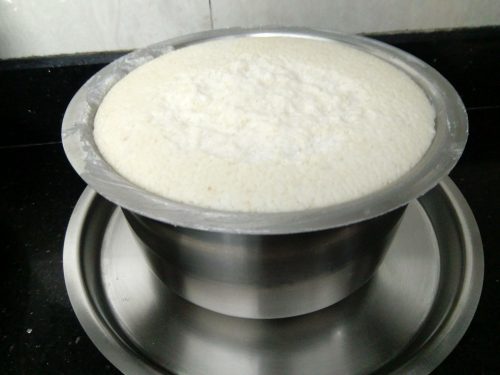
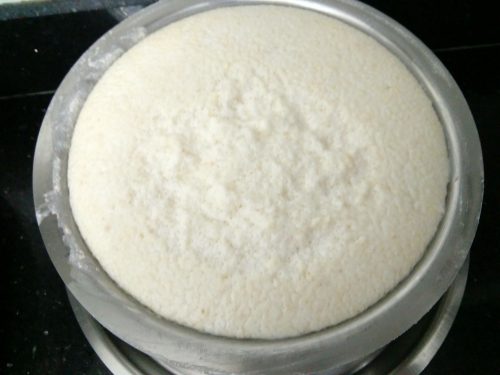

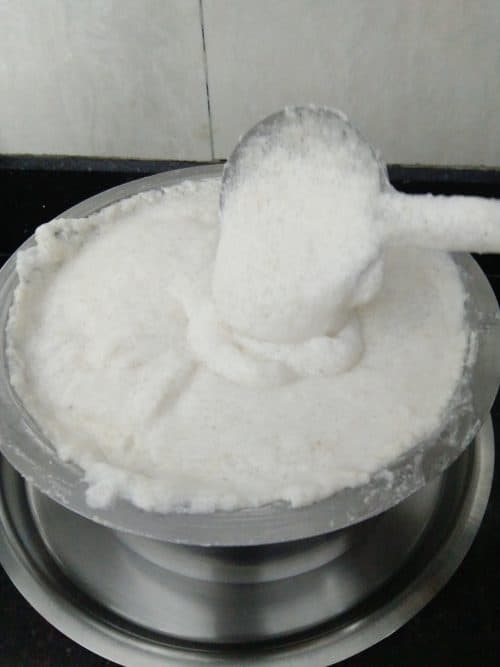
Notes –
- While fermentation, it is important to keep the batter in a warm place.
- As you can observe from the pics, I have left the batter on the gas stove at night.
- If you live abroad in cold climate, it is recommended to keep the batter inside an oven (no heating required)
- Cover the batter with a tight lid and place a warm damp cloth (cloth soaked and squeezed in warm water) on top to provide additional warmth.
- Place a steel plate or any other vessel below so that if batter rises and spills, it won’t be wasted. (Picture 2 above)
- Do not disturb the batter while fermentation. Opening and checking the batter continuously will not help in rising. It affects the taste too and mostly leads to improper fermentation and bitter taste in batter.
How to Make Super Soft Idlis?
- Once the batter has risen, don’t OVER MIX it!
- Always gently fold the batter and add salt along with some water, if too thick to achieve desired consistency.
- Grease the idli moulds with some oil and add the batter else it would stick.
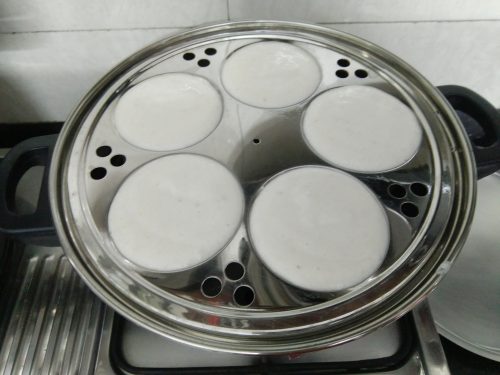
- Either use a steamer or you can steam the idli moulds on a stand in a pressure cooker too. Do not keep weight. Just allow the steam to pass (add sufficient water in the cooker) for a good 15 minutes.
- After the steaming has concluded, always wait for the idlis to slightly cool down and then demould them.
Now that you are all geared up to make idlis at home, read the recipe with exact quantities below.
You can also check out more South Indian Breakfast Recipes like Oats and Mixed Millets Dosa, Adai and Avial, Brown Rice Arisi Kozhukattai.
Recipe for Idli / How to make Soft Idli at home
1 cup is 120 ml measurement
Yields around 25 idlis
Ingredients
- 2 cups Idli Rice
- 1 cup Raw Rice
- 1 cup Whole urad dal
- Water as required to grind the idli batter + Adjusting consistency + For Steaming
- ½ tsp Methi seeds / Fenugreek seeds / methi dana
- Few drops of oil for greasing the idli moulds
- Salt as per taste
Method
- Wash the rice and the Urad dal 2-3 times. Soak them separately for atleast 4 to 6 hours. Add Methi seeds to the Urad Dal while soaking.
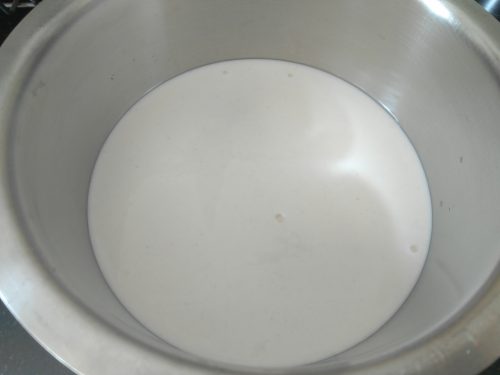
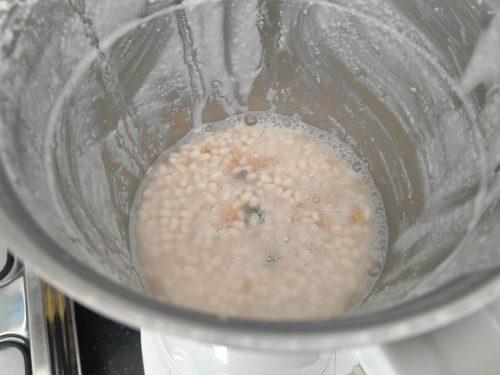
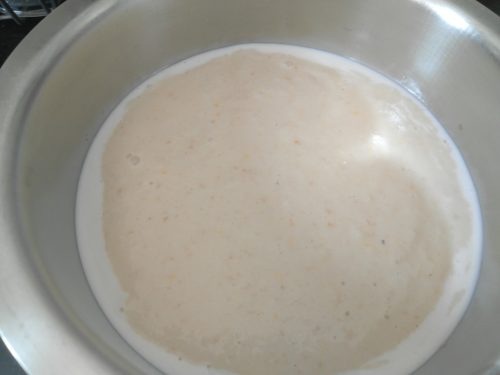
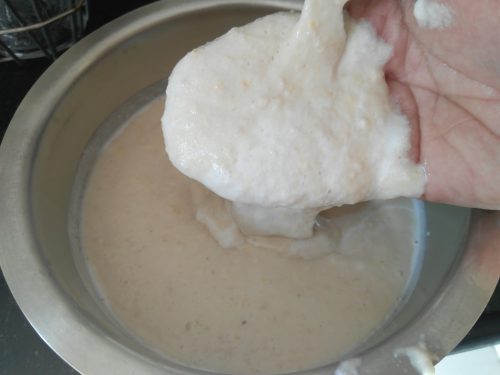
- After 6 hours, discard the water used for soaking and grind them separately using little water. Check the consistency below in the picture.
- Mix well with clean dry hands and keep it in a warm place for fermentation (8 to 10 hours / overnight).
- Once the batter has risen, mix it gently with a clean dry spoon, add salt and some water to adjust consistency.
- Always add few tblsp of water to the risen batter and do not directly steam it as it would lead to very dense idlis.
- Prepare the steamer and Grease idli moulds with oil.
- Slowly fill the moulds with the batter and steam them for atleast 15 to 20 minutes on medium flame.
- Switch off the steamer, allow it to cool and then open the lid.
- Demould the idlis once they have slightly cooled down else it would crack and break.
Recipe Notes –
- I always use steel vessels for storing the batter.
- I don’t add salt to the batter.
- I prefer adding salt after fermentation. I find this method beneficial as the batter doesn’t get very tangy / khatta especially during summer season. Stays good in the fridge for a long period too.
- No Idli Rava, Poha or Baking soda is added during the process.
If you try this recipe at home, please give me a shout out / Tag Me on any of my social media handles.
- Twitter - https://twitter.com/masalachilli
- Facebook Page - https://www.facebook.com/MasalachillibyVidyaNarayan/
- Pinterest - https://in.pinterest.com/masalachilli
- Instagram https://www.instagram.com/masalachilli_vidyanarayan/
Vidya Narayan

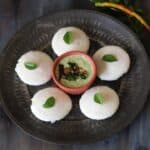
Idli Recipe / How to make Soft Idli at home
Equipment
- Mixer Grinder
- Steamer
Ingredients
- 2 cups Idli Rice 1 cup is 120 ml measurement
- 1 cup Raw Rice
- 1 cup Whole Urad Dal
- Water as required to grind the idli batter + Adjusting consistency + For Steaming
- 1/2 tsp Methi Seeds / Fenugreek Seeds or Methi Dana
- Few drops of Oil as required to grease the Idli Plates I have used Sesame Oil
- Salt to taste
Instructions
- Wash the rice and the Urad dal 2-3 times. Soak them separately for atleast 4 to 6 hours. Add Methi seeds to the Urad Dal while soaking.
- After 6 hours, discard the water used for soaking and grind them separately using little water. Check the consistency below in the picture
- Mix well with clean dry hands and keep it in a warm place for fermentation (8 to 10 hours / overnight).
- Once the batter has risen, mix it gently with a clean dry spoon, add salt and some water to adjust consistency.
- Always add few tblsp of water to the risen batter and do not directly steam it as it would lead to very dense idlis
- Prepare the steamer and Grease idli moulds with oil.
- Slowly fill the moulds with the batter and steam them for atleast 15 to 20 minutes on medium flame
- Switch off the steamer, allow it to cool and then open the lid.
- Demould the idlis once they have slightly cooled down else it would crack and break
Notes
- I always use steel vessels for storing the batter.
- I don’t add salt to the batter before fermentation.
- I prefer adding salt after fermentation. I find this method beneficial as the batter doesn’t get very tangy / khatta especially during summer season. Stays fresh in the fridge for a long period too.
- No Idli Rava, Poha or Baking soda is added during the process.