
Wholesome, Comforting Weekday Meal or Weekend Menu with family - This Indian Chickpea Curry or Chana Masala is a family favorite. Try this if you are fans of chickpeas or garbanzo beans and Indian Curries. Serve with steamed Basmati Rice or Indian Breads.
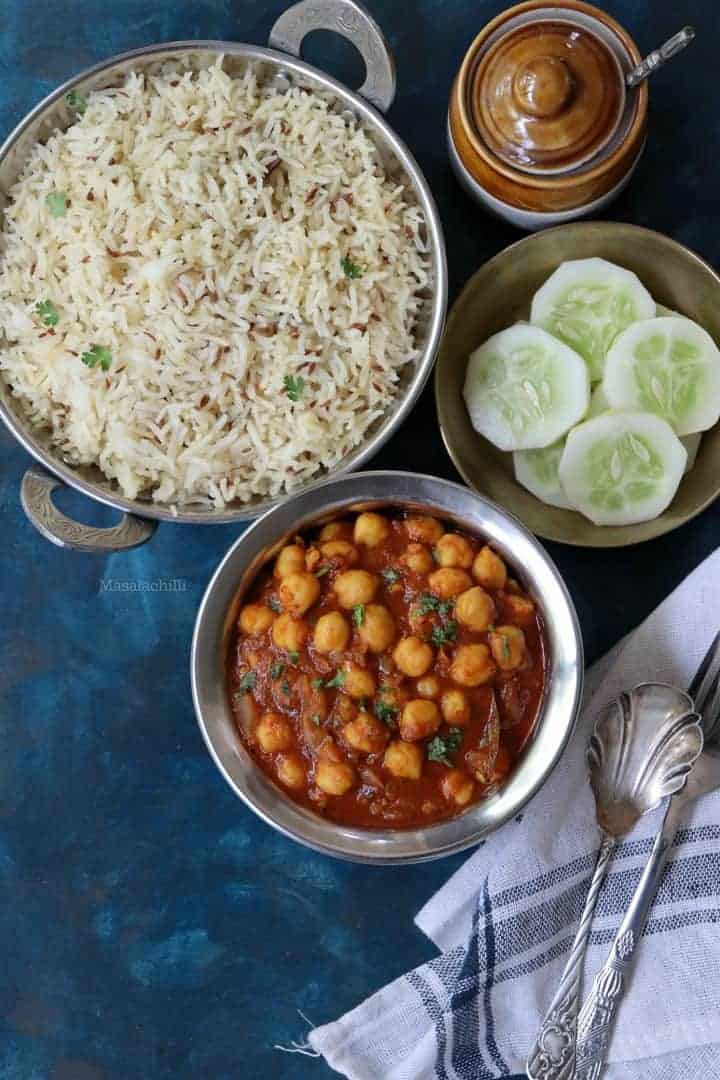
Today's recipe is a popular North Indian Gravy Sabzi called Chana Masala. Chana refers to Chickpeas, Garbanzo Beans or Kabuli Chana. A delicious curry recipe made with basic Indian Spices and served with Indian Breads or Steamed Basmati Rice.
This Chickpeas curry makes a hearty Sunday Lunch. Best part about serving Chana Masala is that it doesn't need any side dish. Just opt for a quick pressure cooker Jeera Rice, serve some salad on the side along with this showstopper gravy.
Made with basic onion tomato gravy and some Indian spices, Chana Masala is a filling and wholesome meal for the family. It shouldn't be mistaken with Punjabi Chole. There are some common elements like onion-tomato gravy and the boiled chickpeas though.
Jump to:
Chole is rather slow cooked, darker in colour and heavy on spices. It is quite tangy too, unlike Chana Masala due to the addition of Aamchur powder (Dry Mango Powder), Anardana powder (pomegranate seeds) and /or Amla (Indian Gooseberry). For Chole, the chickpeas are even pressure cooked with a tea bag or Amla that stains them brown.
My version of the Chana Masala is a simple home style preparation. Your everyday chickpea curry with basic ingredients from pantry. This is what our family prefers for Sunday lunch.

Soaking and Cooking the Chickpeas
The first step for Chana Masala is a 5 minute overnight prep work that you have to follow.
- Soaking the chickpeas overnight or atleast 8 hours is recommended (Image 1)
- The longer you soak, the faster it cooks in the pressure cooker or Instant Pot.
- I wouldn't recommend cooking the chickpeas on stove top, unless you have a lot of time on hand.
- It could take anywhere between 45 minutes to an hour to cook the soaked beans on a stove top. Pressure cooker or Instant Pot would take less time even when it comes to large quantities.
- The chickpeas should be soft and mushy when pressed between your thumb and index finger. This will enable the chickpeas to soak up the gravy. (Image 3)

Image 1 
Image 2 Image 3


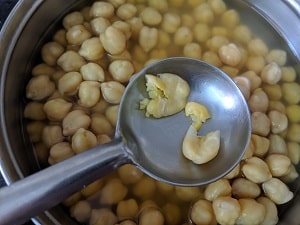
Once the chickpeas have cooked, rest of the ingredients are very easy to gather and prep.
My Mother was a big fan of Chana Masala and Bhindi Masala, the only two North Indian Gravy Recipes that she ate at a restaurant (without garlic) along with poori or naan.
After I got married, I found a Chana Masala fan in my husband so life has come a full circle with me cooking this for him now on Sundays, sharing stories about my mother.
Other Chickpea Recipes to try -
- Chickpeas Sundal - South Indian Snack with chickpeas and coconut
- Air Fryer Roasted Chickpeas - Tea time snack or anytime munching
Coming back to the recipe, Chickpeas is quite a versatile ingredient, available in most pantries. A good source of plant-based protein, these legumes can be versatile and used in many recipes.
However, many face issues related to flatulence, bloating and wind after consuming chickpeas. Below are our top tips that help you solve these issues.
Top Tips
- Discard the water that is used to soak the beans. It leads to poor digestion and increased flatulence or wind. PS - I use the soaked water for watering my plants. No wastage!
- Less Soaking time - Most of us are in a hurry and tend to soak less or pressure cook more (cheat's way). Beans and Legumes, by nature, require ample time to soak and absorb water.
- Hence it is always recommended to soak and not consume dry beans directly.
- Chickpeas is quite filling and makes a hearty lunch. It also tends to take longer to digest.
- I recommend consuming chickpeas curry, like this one, during the first half of the day, when the body is most active.

Canned Chickpeas vs Soaked Chickpeas
This recipe uses Dried Chickpeas that are soaked overnight and cooked.
If you do not have access to dried chickpeas and prefer using ready to eat canned chickpeas, here are some of the tips you can follow.
- Open the can of chickpeas, Drain the water.
- Rinse well with water couple of times, drain completely and then cook for atleast 10 odd minutes until they are soft.
- The canned chickpeas is now ready to use for cooking the curry.
Note - Even though canned chickpeas are pre-cooked, cooking them for an extra 10 minutes would lead to softer chickpeas that can absorb the gravy flavours, especially for Indian gravy recipes. You can skip this step, if you like.
Bonus - Cooking with canned chickpeas saves soaking time and pressure cooking. Ideal for busy weekdays or if ingredients are inaccessible.
Step by Step Instructions
Step 1 - Pressure cook 2 cups of over night Soaked Chickpeas with 4 cups of water. Add salt while pressure cooking so the chickpeas don't taste bland.
Step 2 - After pressure cooking, drain the water and keep aside. The water is used to adjust the gravy consistency. Do not discard.
Step 1 Step 2


Step 3 to 6 - Finely chop the onions, mince the ginger garlic and green chilli in a mixer grinder or food processor. Puree the tomatoes and set aside.
Step 3 Step 4
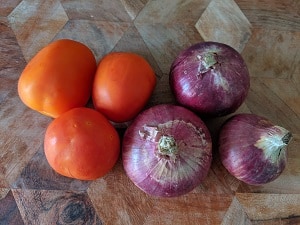

Step 5 Step 6


Step 7 - Heat a pan or thick bottom kadhai, add oil and whole spices (bay leaf, cinnamon sticks).
Step 8 - Now add the minced ginger-garlic-green chillies paste and saute well until there is no raw smell.
Step 7 Step 8

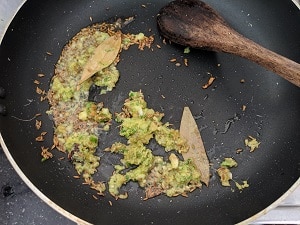
Step 9 & 10 - Now add the chopped onions and cook them on low heat until they have turned brown.
Step 9 Step 10


Step 11 & 12 - Add the tomato puree and the spices (coriander powder, turmeric powder, jeera powder, red chilli powder and garam masala)
Step 11 Step 12
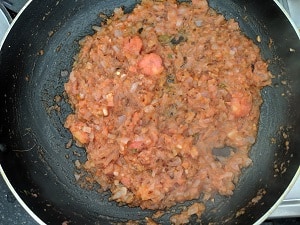
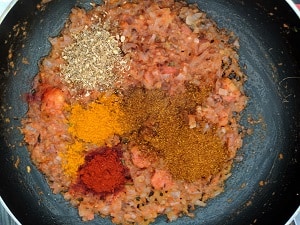
Step 13 - Cook this mixture (bhuno in Hindi) well until there is no raw smell of the tomatoes or the spices. It should be dry and leave some oil on the sides.
Step 14 - Once the gravy base has cooked well. Add the cooked chickpeas.
Step 13 Step 14

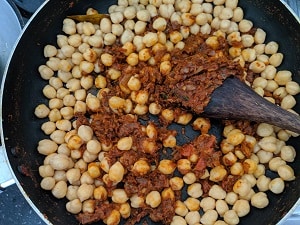
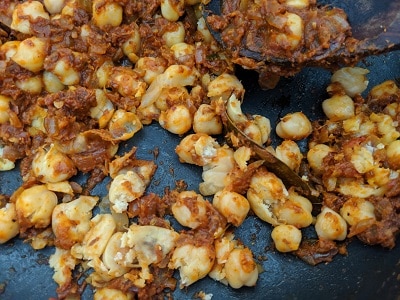
Step 15 - With the back of your spoon, mash some chickpeas lightly (this makes the gravy thicker)
Step 15 (Before) 
Step 15 (After)

Step 16 - Once the masala has coated the chickpeas, add the reserved chickpeas water along with some salt to taste. Adjust consistency by adding some more water and let the chana masala simmer for atleast 15 minutes on low heat (covered with lid)
Step 17 - This helps the masala to penetrate the chickpeas and a thick luscious gravy forms. Once you notice the gravy thicken, switch off, add some coriander leaves and serve hot.
Step 16 Step 17

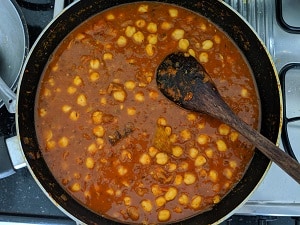
Pro Tip - Mashing some of the cooked chickpeas leads to thick gravy. This is something my mother used to follow partially because she couldn't bite hard beans due to her dental issues. This really works and I follow this till today. If you haven't tried this, please do so!
Recipe Notes
- Please note that I have measured the chickpeas quantity only after soaking them.
- No Baking Soda is added to soften the chickpeas while cooking, which is usually a practice in restaurants to even elevate the taste.
- I have used basic spices available at home to make this recipe.
- Garam Masala powder can be replaced with store bought Chole Masala too.
- You can add chopped tomatoes instead of puree. We prefer puree as it leads to a good gravy texture.
- Kashmiri Red chilli powder is used for the recipe. You can add paprika or cayenne if you prefer heat.

Ideas to use Leftovers
- Grind the Chana Masala in a mixer grinder and add it to a bowl. Add wheat flour as required, salt to taste some coriander leaves or spring onions and knead into a dough. Roll out chapatis or thick paratha and serve with plain curd. You can pack these for kids tiffin box as well.
- Chana Masala Sliders - Saute the gravy in a pan with some butter until the gravy dries out a bit. Slit open burger buns and fill this mixture, add chopped onions, some cilantro and serve warm.
- Chana Masala Rice - Mix some steamed rice with the leftover gravy, saute it with some onions etc and serve with a side of raita.
- Sandwich - Make Grilled Sandwiches by applying a layer of home made green chutney on bread slices followed by a spoonful of chana masala gravy. Grill the sandwiches with some butter or oil and serve hot.
Additional Notes / FAQ's
Yes. Leftover Chana Masala tastes amazing. You can freeze this and reheat when required. Stays fresh in the refrigerator for atleast 5-6 days and more in case of freezer.
Indian Breads - Roti, Paratha, Naan Bread.
Rice - Jeera Rice, Steamed Rice, Pulao
Sliced Breads, Pav buns or Dinner Rolls.
Once you taste test the gravy and find that it is too sour, add a pinch of sugar or jaggery. Mix and taste check again. Add more if required but always start with a pinch.
If you have ready chapati dough balls, add couple of them and allow the dough ball to soak the spice. Remove it before serving.
Else, you can add some sugar or jaggery to the gravy and reduce the spice levels.
I recommended using Kashmiri Red chilli powder for this recipe. It is not spicy and also lends a good colour.
You can add Paneer (saute it on the tawa or pan before adding)
Add Boiled potatoes to this recipe. Potatoes would naturally thicken the chana masala gravy.
Other North Indian Recipes to try -
Instant Pot Rajma - Indian Kidney Bean curry
Vegan Dal Makhani - An Instant Pot recipe made with black gram and kidney beans.
Black Eyed Peas Curry - Cow Peas or Lobia Masala made in an Instant Pot.
Please take a moment to LEAVE A COMMENT and a STAR * rating on the blog. It would encourage others to try the recipeor you could TAG US on any of our social media handles – INSTAGRAM, TWITTER, FACEBOOK PAGE AND PINTEREST.

Chana Masala (Easy Indian Chickpea Curry)
Equipment
- Pressure Cooker
Ingredients
- 2 cups Soaked Chickpeas Read Notes below
- 2 cups Water for Pressure Cooking Chickpeas Extra as required to adjust gravy consistency
- Salt to taste
For the Gravy
- 3 Onions medium size, finely chopped
- 3 Tomatoes medium size, pureed
- 2 Green chillies
- 6-7 nos Garlic Cloves
- 1 tbsp Ginger Paste
- 2 tbsp Oil use vegetable oil or any neutral oil
- 2 Bay Leaf
- Cinnamon Stick (1/4th inch x 2 nos)
- 2 tsp Garam Masala Powder
- 1 tsp Turmeric Powder or Haldi Powder
- 1 tsp Coriander powder or Dhania powder
- 1 tsp Jeera Powder or Cumin powder
- 1 tsp Kashmiri Red chilli powder
- 1 tbsp Finely chopped coriander leaves garnish while serving
1 cup is 250 ml, 1 tbsp 15 ml, 1 tsp 5 ml
Instructions
- Pressure cook 2 cups of over night Soaked Chickpeas with 4 cups of water. Add salt while pressure cooking so the chickpeas don't taste bland. After pressure cooking, drain the water and keep aside. This will be used to adjust the gravy consistency. Do not discard.
- Prep the ingredients while the chickpeas arepressure cooking. Finely chop the onions, Puree the tomatoes and mince gingerpaste, garlic cloves and green chillies in the mixer grinder and set aside.
- Heat a pan or thick bottom kadhai, add oil and whole spices (bay leaf,cinnamon sticks).
- Now add the minced ginger-garlic-green chillies paste and saute welluntil there is no raw smell. Now add the chopped onions and cook them on low heat until they arebrown in colour.
- Add the tomato puree and the spices (coriander powder, turmeric powder,jeera powder, red chilli powder and garam masala)
- Cookthis mixture (bhuno) well until there is no raw smell of the tomatoes or thespices. It should be dry and leave some oil on the sides
- Once the gravy base has cooked well. Add the cooked chickpeas.
- With the back of your spoon, mash some chickpeas lightly (this makes thegravy thicker)
- Once the masala has coated the chickpeas, add the reserved chickpeaswater along with some salt to taste. Adjust water consistency by adding somemore water and let the chana masala simmer for atleast 15 minutes on low heat(covered with lid)
- This helps the masala to penetrate the chickpeas and a thick lusciousgravy forms. Once you notice the gravy thicken, switch off, add some corianderleaves and serve hot.

Notes
- Please note that I have measured the chickpeas quantity only after soaking them.
- No Baking Soda is added to soften the chickpeas while cooking, which is usually a practice in restaurants to even elevate the taste.
- I have used basic spices available at home to make this recipe.
- Garam Masala powder can be replaced with store bought Chole Masala too.
- You can add chopped tomatoes instead of puree. We prefer puree as it leads to a good gravy texture.
- Kashmiri Red chilli powder is used for the recipe.
You can also subscribe to our website to receive all the delicious recipes in your mail box.
We will be back again with yet another exciting recipe .. Until then, stay healthy and happy!
Vidya Narayan
Leave a Reply