
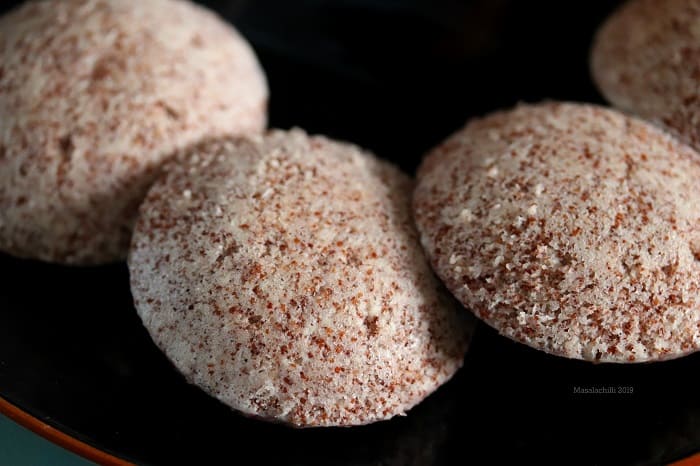
Ragi Idli is a healthy, nutritious South Indian Vegetarian Breakfast Recipe made with whole Ragi or Finger Millet. Step By Step Recipe to make perfect Ragi Idli Batter, with tips on fermentation, batter consistency for pillow soft and spongy idlis.

Ragi Idli Recipe - Healthy, Nutritious Finger millet idli or nachni idli made with fermented batter of whole ragi, urad dal and rice. Delicious South Indian breakfast recipe served with coconut chutney and sambar.
This is NOT an Instant Ragi Idli recipe. It consists of soaked and ground whole ragi or ragi seeds. No Ragi Flour used for the recipe.
Similar to traditional South Indian Idli, Ragi Idli is soft, fluffy and light. Once you read the health benefits of consuming ragi, this will most likely be a staple breakfast at home.
Sourcing whole ragi or ragi seeds is easy. It is available in supermarkets, local grocery stores etc.
Making ragi batter is quite similar to traditional Idli batter. Fermentation process takes 6-8 hours depending on weather conditions. If you live in countries that experience cold climate, I have included tips on fermenting the batter in an Instant Pot.
Use this ragi Idli batter to make crispy dosa and soft Uttapam. The batter is multipurpose. Refer to notes in the recipe card.
Jump to:
About Ragi
Ragi is Finger Millet and quite rich in nutrients. In Hindi, it's called Nachni.
India is the largest producer of Finger Millet.
It has many health benefits but most of all, it is extremely delicious.
Ragi Flour and Whole Ragi Seeds is easily available and used in a variety of dishes. It is gluten-free, vegan.
I make delicious Ragi Rava Dosa using Finger millet flour, semolina and rice flour.
Health Benefits of Ragi
- Rich in calcium and high in fibre - This Gluten Free millet keeps you full for longer.
- Excellent for diabetics, Growing kids
- Growing up, we were fed Ragi Koozhu or Kanji as baby food. This is quite common in South India and my mother followed the same too.
Disclaimer - Do not forget to take your doctor's advise before adding or subtracting ingredients from your diet.

How to Make Ragi Idli batter
In a bowl, add 2 cups of whole ragi and 1 cup of rice (Idli Rice). In another bowl, measure and add 1 cup of urad dal and 1/4 teaspoon of methi seeds (fenugreek).
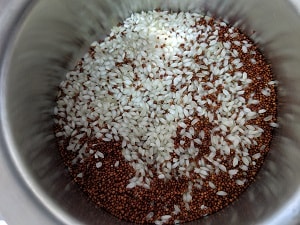
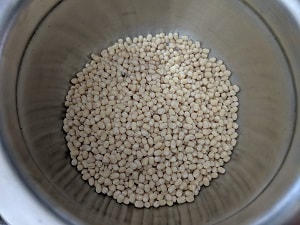
Rinse and soak all the ingredients for 6-8 hours. Overnight works best.
Next morning, drain the water used for soaking. Rinse and keep aside.
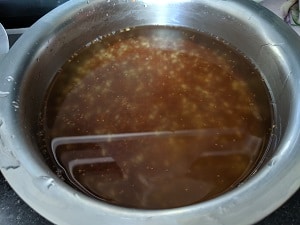
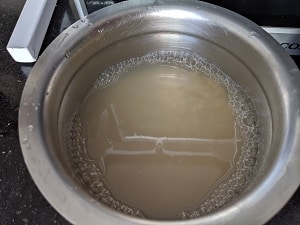
First grind Urad dal with methi seeds using water (in a wet grinder or mixer grinder) until smooth and creamy. Place this aside in a bowl.
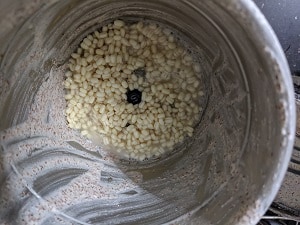
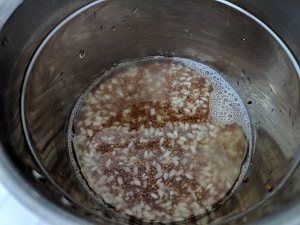
Next grind rice and ragi with water. Add this to the urad dal and methi batter. Mix well using hands.
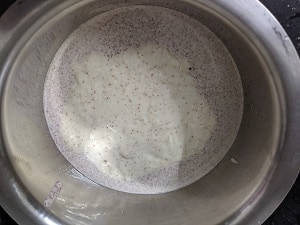
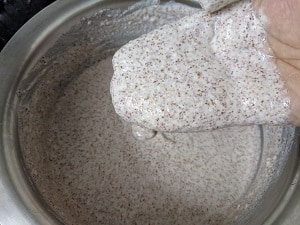
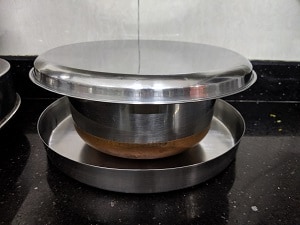
Cover and keep this aside to ferment for 6-8 hours.
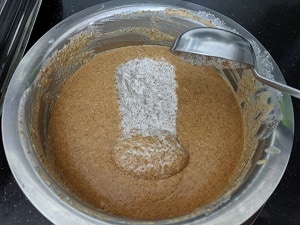
After the batter ferments, add salt, mix and prepare the steamer for making Idli.
Boil water in the steamer, grease the idli plates with few drops of oil and add a ladle of ragi idli batter. Place the Idli stand in the steamer and steam the idli for 10 - 12 mins.
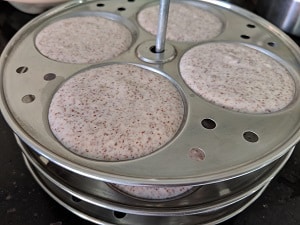
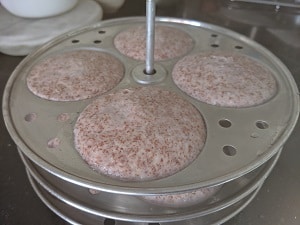
Once idli is steamed, set it aside to cool slightly before demolding. Serve hot with sambar and chutney.
If not making Idli immediately, cover and store the batter in the refrigerator.
Fermentation Tips
Use fresh ingredients. The Urad Dal should be fresh. Rinse all ingredients, multiple times to remove residual dirt and dust on the grains.
Fermentation process is key to soft Idli. If the batter doesn't ferment within 10 hours, it may form mold and smell.
In tropical or warm countries, fermentation is not an issue. The process usually occurs between 6-10 hours.
In cold countries or countries that experience harsh winters, fermentation may take longer.
For quick fermentation in cold climate, store the batter in an oven (with light on). Don't forget to place a tray or plate below the container to prevent the batter from overflowing.
Instant Pot Yogurt Mode is the best way to ensure fermentation in cold climate. Add the ground idli batter in the steel insert. Press Yogurt Mode - Normal Mode and set the timer to 8 hours. Cover the Instant Pot with a glass lid. Do not use the Instant Pot pressure cook lid.
Once the batter ferments, add salt and gently mix the batter. Do not mix the batter rigorously.
Common Mistakes when Steaming Idli
Idli cracks while steaming - Excess batter poured into the idli mold. Always leave some space for the batter to rise while steaming.

Hard Idli - Batter consistency is wrong. Too less water = hard idli.
Do not steam idli for more than 10-12 mins. Don't open the steamer once you switch off the heat. Give it 1-2 mins before opening the lid and removing the idli stand.
Serving Suggestion | Side Dish for Ragi Idli

Chutney - Ellu Podi (Dry Sesame Chutney), Smoked Eggplant chutney, Peerkangai Thol Chutney (Ridge Gourd skin chutney), Tomato Chutney or Thakkali Chutney, Kothamalli Chutney (Coconut Coriander Chutney)
Storage
Store Ragi Idli batter in the refrigerator for a week.
In summer, batter tends to taste sour after 2-3 days. You can make Uttapam or paniyaram using the sour batter.
Other Millet breakfast recipes
Proso Millet Idli (No rice)
Ragi Rotti (Flatbreads)
Please take a moment to LEAVE A COMMENT and a STAR * rating on the blog. It would encourage others to try the recipe or you could TAG US on any of our social media handles –INSTAGRAM, TWITTER, FACEBOOK PAGE AND PINTEREST.

Ragi Idli Recipe (Finger Millet Idli)
Equipment
- Steamer
- Mixer Grinder
Ingredients
- 2 cups Ragi or Finger Millet / Nachni whole ragi used
- 1 cup Idli Rice or use short grain sona masuri, kolam etc
- 1 cup Urad Dal
- ¼ tsp Methi Seeds or Fenugreek Seeds
- Water as required for soaking and grinding
- 1-2 tsp Oil to Grease the Idli plates for steaming I have used sesame oil
- Salt to taste Check notes below
Instructions
- In a bowl, add 2 cups of whole ragi and 1 cup of rice (Idli Rice). In another bowl, measure and add 1 cup of urad dal and 1/4 teaspoon of methi seeds (fenugreek).
- Rinse and soak all the ingredients for 6-8 hours. Overnight works best.
- Next morning, drain the water used for soaking. Rinse and keep aside.
- First grind Urad dal with methi seeds using water (in a wet grinder or mixer grinder) until smooth and creamy. Place this aside in a bowl.
- Next grind rice and ragi with water. Add this to the urad dal and methi batter. Mix well using hands.
- Cover and keep this aside to ferment for 6-8 hours.
- After the batter ferments, add salt, mix and prepare the steamer for making Idli.
- Boil water in the steamer, grease the idli plates with few drops of oil and add a ladle of ragi idli batter. Place the Idli stand in the steamer and steam the idli for 10 - 12 mins.
- Once idli is steamed, remove and set it aside to cool slightly before demolding. Serve hot with sambar and chutney.
- If not making Idli immediately, cover and store the batter in the refrigerator.
Notes
- When placing the idli batter for fermentation, keep a plate below the container. It prevents wastage in case the batter overflows due to fermentation. (see step by step pics for more clarity)
- Use fresh ingredients. Stale or old urad dal will affect quality of batter and texture of idli.
- Mixing the batter using hands aids fermentation process. Do not skip this step.
- I add salt to the batter after fermentation.
- If using a mixer grinder, use ice cubes to grind urad dal batter. It prevents the mixer grinder jar from overheating.
- The batter is multipurpose. You can adjust consistency of the batter and make dosa, uttapam and paniyaram.
- Yields 22 - 24 idli depending on the size of Idli Plate.
Please subscribe to our website to receive all the delicious recipes in your mail box.
We will be back again with yet another exciting recipe .. Until then, stay healthy and happy!
Vidya Narayan
Hi Vidya,
Will surely try the recipe. If grinding in grinder the ratio remains same?
Hi, The ratio of ingredients and soaking time remains same whether you grind in the mixer grinder or your stone grinder. Just ensure you add water wisely while grinding. Do let me know how they turned out. Thank you for stopping by.
Hey Vidya....
Thank you so much for the detailed recipe...have always tried the Ragi Dosa/Idly mix to make them..
After seeing this post I immediately soaked the ingredients and made Idly the very best day...the best part was idlys were soft n fluffy even after a while...
Also tried the dosa version ...too yumm
Once again thank you ...keep sharing such healthy n easy breakfast menu recipes...
Thank you for the wonderful feedback and glad you know you have ditched the ready mixes for the real deal! Healthy eating is totally fun and readers like you, reinforce this logic every single day.
Hello,can we use rice flour,urud flour and ragi flour in the same ratio and make idli please?I have no whole ingredients but flour now but am very tempted to make it:)
Hi, If you do not have access to the whole Ragi Seeds, you can make the batter with 1 cup Rice, 3/4th cup Urad Dal, 1/2 cup poha and 1 cup Ragi Flour. Add the Ragi flour to the batter of rice, urad dal and poha. Rice, Urad Dal and Poha needs to be soaked and ground like regular idli batter and the ragi flour needs to be mixed well and set aside for fermentation. If you are planning to use all flours, then I would suggest making a dosa instead. Soaking Urad Dal and Rice is crucial for a good Idli. Hope this helps. Do let me know.
Perfect idly. Well written recipe. This became a weekly staple for our family and i am very proud to feed them healthy ragi. Thank you for the recipe and perfect measurement of ingredients that made my life easy.
Thank you Saleena for your feedback and glad the family enjoyed the Ragi Idli. Do visit our website for many more such healthy breakfast recipes. Cheers!
Thanks you so much Vidya, for the detailed recipe. I followed it to the T, and the outcome was no doubt DELICIOUS.. definitely worth trying! The idlis were soft and liked by all in the family. I served it for breakfast. Thanks again.
Hi Archana,
Thank you so much for stopping by and sharing your valuable feedback. Readers like you make my blogging journey totally worthwhile. So glad the ragi recipe was loved by the family. Do try other millet recipes or idli recipes from the blog and I am sure you would love that as well.
Cheers
Vidya
Hi Vidya thanks for the recipee, can i avoid rice altogether? im trying to remove all rice wheat in my diet grains too... im sticking to mostly millets only... is it possible to do idli dosa with just millet,,,like only ragi or only pearl millet etc?
Hello Nandhini,
Can you check out my post on "Proso Millet Idli" It is just as per your requirement. Also, its a no rice idli recipe. I apologize for the delay in responding to your comment.
I tried ur recipe and the it came out really good. Thank you.. keep doing the good work.
Hi Shuba,
Thank you for the much needed motivation which fuels my passion towards cooking and trying new recipes.
So glad the Idli's turned out well and thank you for sharing your feedback with us.
Keep visiting us for more such recipes.
Thank you,
Vidya
Fantastic recipe Vidya! I tried this and loved it! A fan of this recipe... and such a good way to use this humble millet... the idlis were light and spongy and so yummy! Thanks for the share
Dear Sandhya,
So happy to hear that you enjoyed the Idlis. We make this regularly at home as well as we love the soft texture. Thank you for the kind words and keep visiting us for more such recipes. Cheers!