
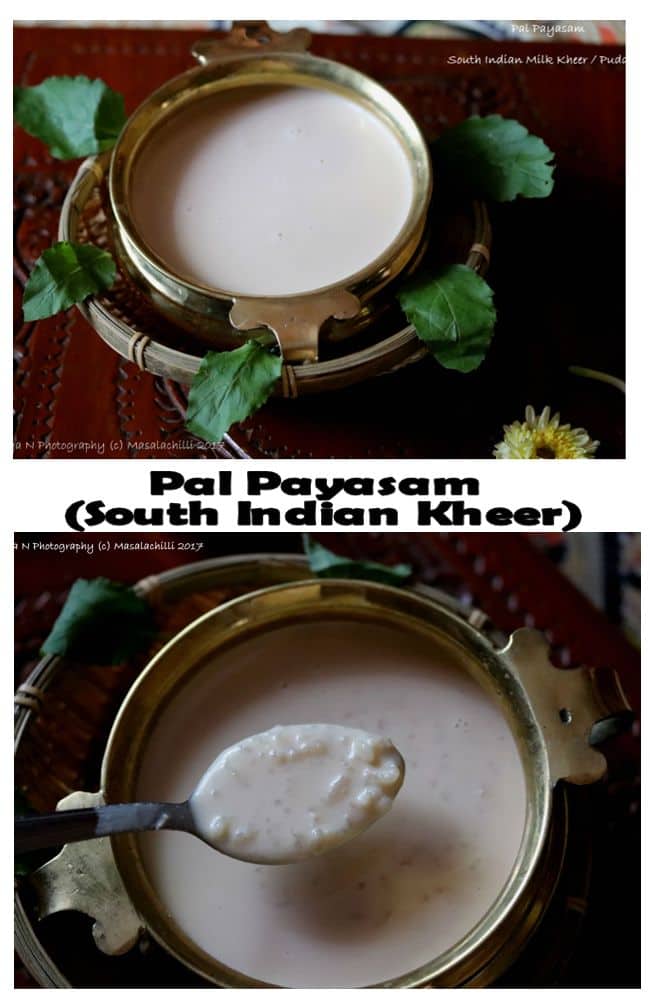
Traditional Pal Payasam or South Indian Milk Kheer made in a pressure cooker. No Stirring! No sweat!

Pal Payasam or Milk Kheer (South Indian Wedding Sweet / Dessert in Pressure Cooker Method)
I am sure you all know a South Indian friend who’s Mom makes Pal Payasam or Milk Kheer during festivals like Onam or Pongal when Saddya (a delicious spread over banana leaf) is served that you really look forward to. Or, if you happen to attend any South Indian wedding and are served this luscious milk pudding post the delicious and extravagant meal and you keep going for a second serving as you cannot get enough of the taste.
This Payasam or milk pudding is also made for all religious functions at home or otherwise. Essentially you need just 3 ingredients to make this dessert but the amount of time it takes to do all the stirring in order to reduce the milk and get the desired level of thickness and colour is something that requires loads of effort. Generally, when there is a function at home, people choose to order the payasam from the caterer rather than cooking it, as it takes a lot of time and not to mention you cannot move away from the stove and have to keep stirring continuously to avoid the burning of the milk.
When my elder sister’s marriage was fixed some years ago into this lovely family, little did we know that we would be learning a recipe that was so simple, saved so much time and tasted delicious too from Shanta Mami (Sister’s MIL) who happens to be a good cook herself. When we tasted the payasam she made using the same method, we couldn’t believe, it was made in a pressure cooker. So, when she gave Ma the recipe, we tried it and boy it worked wonderfully. So, long story short, it’s been 15 odd years that we have been following this recipe. Have also taught some relatives from my husband’s side too to try this recipe after they tasted some payasam at our place and it has been a huge hit.
When we (Narayan & me) first got married, we had to perform our Sashti Vratham or Fasting for Lord Murugan or Kartikeya (Lord Ganesha’s Brother) as this is something that Narayan’s family has been following for ages. As a dutiful daughter in law, I was supposed to make this payasam and when I told Narayan that I would be making it in a pressure cooker, he was shocked to hear it. He was habituated to a quick version of Pal Payasam that his mother made, which was just boiling of milk and rice, adding of sugar and not reducing it at all .. It was more like drinking sweet milk that had few rice grains in it.
Once he tasted, he was convinced about two things (1) I make Pal Payasam better than his mom (which is very difficult for sons to say) (2) I can multitask wonderfully.
We all need some tricks and treats to function effectively and smartly at home isn’t it? Especially when you have to single handedly do things minus help and getting things organized during religious festivals demand a lot out of you. So the next time you have any function at your home, try opting for this method of making payasam and trust me, you will only be showered with compliments and when you tell them you did that in a cooker in an hour, they will be stunned!!
Before you proceed to make the payasam, please go through the recipe notes FIRST.
Do try this recipe and I am sure that you will thank me for sharing this with you!!
Recipe for Pal Payasam or Milk Kheer (Pressure cooker method)
Prep Time – 10 mins
Cooking time – 45 mins
Cooling time – 10 mins
(Please read the recipe notes first before proceeding to ensure best results)
Ingredients
- Raw Milk – 1 Litre (Cow Milk)
- Sugar – 1 cup
- Rice – ¼ cup
Method –
- Wash the rice 1 -2 times with water and drain all the excess water.
- Pour 1 litre cow milk in a vessel (unpasteurized milk / raw milk) and then add the washed rice.
- Close the vessel with a lid. Ensure the vessel that you use to make the kheer or payasam should be a thick bottom vessel and large enough so that when the milk heats up in the cooker, it won’t completely spill out.
- Place the cooker over heat until you hear the first whistle.
- When you hear one whistle from the cooker, reduce the gas flame to the lowest. From this point on, let the kheer or payasam cook for 45 minutes. Setting a timer helps in this case.
- In between the 45 mins of cooking time, you will hear 4-5 whistles which is ok. Don’t increase the flame at any point.
- After 45 mins, switch off the gas and allow the cooker to completely cool. Don’t be in any rush to open the cooker. PS – If you are in a rush for the pooja, switch on the fan which ensures the cooling is faster.
- Once cooled slightly, remove the vessel, open the lid and with a clean dry spoon mix everything well. You will notice a nice pinkish brown milk colour & the texture of the milk would be thick with the rice completely broken and cooked well into tiny pieces.
- Add the sugar and mix well. Keep it aside for 5 mins for the sugar to completely dissolve before serving warm or you can refrigerate it once it reaches room temperature and serve it cold too.
- This method allows you to finish other chores rather than standing & stirring the milk (which is the traditional method) else it might burn.
Recipe Notes –
- Use a big cooker, say 10 litre cooker. Small cookers say 5 litre ones would be ok for ½ a litre of payasam. Also, ensure you use steel cooker instead of aluminum ones, as they have a thicker coating at the bottom. If you have an aluminum cooker, ensure your vessel for making the payasam has a thick bottom. Many cases safety valves or gasket damage etc happens only because the cooker has been kept on heat for a long time and is not capable to hold the contents with continuous heat and pressure. The big or large cooker allows space, heat to travel and continuous pressure release via the whistle.
- The vessel that you decide to place in the cooker should be good enough to hold atleast 3 litres of liquid. This ensures the cooking is even and you get a lovely creamy texture. Since you are using unpasteurized milk / raw milk, the milk will first boil and then reduce down eventually during the 45 minutes of cooking time inside the cooker. Hence if the vessel is not big enough, a large part of the liquid will ooze out.
- Ensure your pressure cooker has water at the bottom to prevent it from burning while cooking. Don’t fill up too much as some amount of liquid (milk) will ooze out from the payasam too. The amount of water that you may be using to cook your regular dal (lentils) or rice is just fine.
- The Milk that we use for all neivedyam / prasad / offerings is Cow Milk. Use a good quality and don’t use a single drop of water to add in the milk. Cow milk gives you the pinkish brown colour that is expected from a good payasam. Buffalo milk though much creamier than cow milk doesn’t give that effect. PS – Packet milk is ok too and gives the same colour and effect.
- Sugar has to be added only after the payasam has completely cooked i.e. after 45 minutes of cooking and 10 odd minutes of cooling. Never add sugar along with the rice and milk mixture and place in the cooker.
- For south indian payasam or kheer, we use kolam rice or ponni raw rice and not basmati rice. The flavor of the milk is important and not that of rice.
- I have mentioned 1 cup sugar as we don’t prefer our payasam to be too sweet. You can add more or less according to your taste.
- No ghee, dry fruits, cardamom powder or saffron are added. This is a traditional recipe that uses only 3 ingredients.
- In many weddings, caterers add condensed milk instead of sugar to give it thickness and colour. I avoid the same. If you want, you can add the same and avoid the sugar. However, decision on how much quantity to be used, is once again up to your taste and preferences.
- This payasam thickens up after few hours of cooling and the next day, it gets even more thick. So, when you see the payasam as slightly liquid at first, don’t worry at all.
Pinterest Link (Pin It for Later) - https://in.pinterest.com/pin/798192733930120489/
If you like my work, please show me some love by following me on:-
- Twitter - https://twitter.com/masalachilli
- Facebook Page - https://www.facebook.com/MasalachillibyVidyaNarayan/
- Pinterest - https://in.pinterest.com/masalachilli
- Instagram https://www.instagram.com/masalachilli_vidyanarayan/
- Google+ Masala Chilli
Vidya Narayan
Vidya it's sooooo yummm... Love it. Very nicely explained ... Lovely share
Thank you dear!
Love this anytime anyday 🙂
Thank you ! I totally get you, same here
Great recipe ! Now I'm going to look for an occasion to try this as early as possible !!
Thanks dear. Do try it, extremely simple and fuss free
I love payasam and will try this pressure cooker method. The only problem is that I may be tempted to make it more often. 😀
Ha Ha ... Make and share will be the only way to keep control, isn't it? Thank you so much dear!
Well explained recipe !
Thanks a lot!
yummy! Vidya what a coincidence I also just made it today although using broken payasam rice (today is Guruvayur ekadasi for us )wish I had seen your thorough explanation of adding the sugar later part , anyway next time will try that!
Oh that is great! U mean Ada payasam? OMG i love that totally! Thank you so much for going thru the post.
Delicious
Thank you!
Wow, interesting tips..!! Like the idea of using Cooker. It will be easier. Everyone is so obsessing over instant pot, I guess the traditional methods and utensils can do the same work. I guess some technique should be implemented. After seeing your recipe I guess I can make this without Instant pot. Thanks for sharing.
Absolutely agree. I don't feel the need to buy several gadgets and absolutely cannot do without my humble pressure cooker for the daily cooking. Glad you liked the post and the tips. Do try them. Pretty simple! Cheers!
Oh yes even I cannot thing my daily cooking without a pressure cooker!! I would love to try this.. And I am sure it's gonna be great. Thank you.
Lovely recipe 🙂
thanks a ton!
This is a genius thought... without baby sitting near the vessel.. payasam is ready ?... your s looks delicious
I agree with you. Thank you so much for stopping by. Cheers!
just made Pal Payasam yesterday for Karthigai deepam! I made it old style and I also make in pressure cooker sometimes!!
Hope you had great celebrations at home for Karthigai. Wishing you the best. Cheers and thank you for stopping by.
I confess something that when I am depressed I see this pic which sets me drooling!Awesome payasam!
Aww... sending you loads of hugs. Thank you dear.
Only name changes of the dishes, but the taste remains same, we call chawal ki kheer..love this yummy and tempting kheer 🙂 Bas thodi si garma garm poori bhi bana lo..:)
Wah kya baat hain ! Poori and Kheer. Waise south mein we have papads and payasam.. weird combination right? but its true. Thanks dear.
Perfect payasam! I remember the first time
I made this before marriage, oh my it came like kali. ? thank god I learnt how to make it properly before marriage.
This payasam is our kudumba payasam ? we make it often, love that beautiful pink hue it has got! Definitely a quicker version, would try and let u know!
Great reading your response and super happy that you loved this quick version. Cooking improves with time, that is why our Moms and MIL's were / are such great cooks right?
Hi Vidya,
I was taught this method by Mythili mami- a close friend of my in-laws. She had said to put 1/2 the sugar needed while cooking and then the remaining at the end. This gives the payasam a brownish tinge as the sugar caramelises. We love it this way.
Why do you think otherwise? I see you wrote ‘ never add sugar......’ in bold!
Hi Jaynti, thank you for stopping by and going through the recipe. The brownish tinge is due to the reduction of the milk and not due to sugar added while cooking the payasam. Traditionally too, sugar is added at the end when the milk has reduced and turned brownish. Since I have been advised by Mami to add sugar at the end even for the pressure cooker version, we have been doing so. So far no issues. But I guess there is no harm in trying your method too someday.
This receipe came out as perfect...it was yummy tooo with less efforts good result
Thank you so much for trying Manisha and glad you liked the payasam.