
Step by Step Recipe to Make Soft Methi Thepla at home. Recipe includes tips to cook thepla for travel, preparing and storing the dough for meal prepping.

Methi Thepla recipe is an Indian Bread or Flatbread made with whole wheat flour, finely chopped methi or fresh fenugreek leaves together with spices. Methi na thepla is a Gujarati delicacy and considered to be one of the best travel food for vegetarians.
Thepla is quite similar to roti or chapati and rolled thin. Serve it for breakfast, lunch, evening snack and dinner. Lauki Thepla is another variation of this recipe.
We make thepla frequently during winter season as fresh fenugreek is available in markets. The winter variety is tender and less bitter in taste.
There are many versions of this recipe. Some recipes call for addition of chickpea flour with whole wheat flour. I am sharing the version I have been following for years.
As vegetarians who don't even consume eggs, methi thepla is a savior during travel. I pack this for my husband's international trips.
This post has details on how to pack thepla for travel, tips on kneading and storing the dough and making methi thepla using kasuri methi.
Jump to:
Ingredients
Fresh Fenugreek leaves or Methi – Use only the leaves. Avoid the thick stems. Finely chop the leaves so that it mixes well with the flour, spices and water.
Whole Wheat Flour (Atta) - You can get whole wheat flour in Indian stores. Aashirvaad brand is quite popular and available in leading supermarkets in India and USA.

Note – Many recipes tend to add Besan or Chickpea Flour while preparing methi thepla.
If using Besan, use 2 cups whole wheat flour and 1 cup Besan and follow the rest of the procedure, as explained below. Always sieve chickpea flour for best results.
If you are consuming the thepla fresh, add besan. If packing for travel or lunchbox, I would suggest avoiding chickpea flour. Chickpea flour makes thepla dry and hard as they cool down.
You can make thepla using a combination of 2 to 3 types of flours. Millet flour (gluten-free) like jowar or bajra can be added with whole wheat flour.
Yogurt – Soft texture of thepla is due to yogurt or curd.
When packing thepla for travel, I skip yogurt as it reduces shelf life.
The full ingredient list is available in the recipe card below. I have provided only details about key ingredients with alternatives or substitutes for easy reference.
How to Make Methi Thepla – Step by Step Recipe
Wash, Rinse, Drain and finely chop Methi Leaves. Keep aside.

In a bowl, add wheat flour, turmeric powder, red chilli powder, ajwain or carom seeds, sesame seeds, salt to taste and sugar. Mix all the dry ingredients.

Now add yogurt and using some water, knead the ingredients into a tight dough.


Rest the dough for 15 to 20 minutes by covering the bowl with a damp kitchen towel or cloth.

After 15 minutes, add 1 tsp of oil and knead the dough again for 5 minutes until the oil is absorbed by the dough.

Now divide the dough into equal round portions. Each of the dough is approximately the size of a golf ball.

Flatten the dough ball, dust it with flour and roll out into thin theplas. Brush off excess flour and prepare for cooking the theplas.

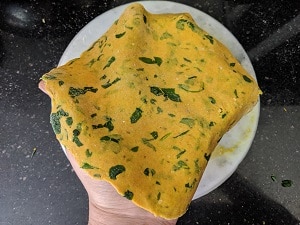
You can roll out all the theplas and then cook them on the griddle together or do the process simultaneously – your choice!
Heat a griddle, cook the theplas on both sides by drizzling oil on the sides and in the centre.

Store the cooked theplas in a hot pot or casserole until you serve so that they are warm.

Tips to Pack Methi thepla for travel
- Like I mentioned above (ingredients list), avoid curd, yogurt or dahi and chickpea flour (besan).
- For 3 cups of flour, which yields 14 to 15 theplas, you can add around 2 tbsp oil to knead the dough and extra for cooking them. It might seem a lot but this increases shelf life.
- Avoid dusting the theplas with too much flour. Use a brush and remove excess flour before cooking them on a griddle.
- The theplas should not be packed when hot or warm. Allow them to cool down completely.
- Wrap theplas in batches of 2 or 4 based on individual requirements so that the entire pack is not compromised, while travelling.
- When travelling, you can carry butter in small packs to slather and eat. My husband, being a pure vegetarian has done that on most of his travels.
- Pickles are difficult to carry, especially on an airplane so always look for easy (read – spill proof) accompaniments.
Side Dish for Methi Thepla
Thepla packs well in lunch boxes for both kids and adults. Makes a great choice for wraps with a stuffing of vegetables, kebabs or paneer. Serves as a filling after school snack for kids.
Most preferred choice of accompaniment with thepla is - yogurt, mango pickle (sweet or spicy) and hot masala chai.
Lentils / Dal - Piping hot thepla with dal is comfort food during colder months. Gujrati Kadhi, Moong Dal and Dal Palak are favorites at home.
Sabzi - Any sabzi or curry with potatoes pair well with thepla. Aloo Gobhi Sabzi, Kale Potatoes, Potato Roast and Aloo Matar are great options.
Raita - Vegetable Raita or Beetroot Raita instead of plain yogurt or curd.
Shelf life of Methi Thepla and dough
Cooked thepla stays fresh for a week. They should be completely cooled before packing. Don't skimp on oil while cooking thepla.
For meal prepping, knead and store the dough upto 48 hours. I avoid adding yogurt when storing the dough in the refrigerator. It affects shelf life.
Adding sugar will ensure the dough doesn't taste bitter even after a couple of days. You won't taste the sugar in the thepla.
Methi thepla can be packed in air tight container or ziplock bag. It stays fresh under refrigeration upto a week. Heat on a griddle, brush some oil, cook for a couple of seconds on both sides and serve. I wouldn't advise re-heating in a microwave as it turns dry and hard.
Methi Thepla with Kasuri Methi
Use 2 tablespoons of Kasuri Methi (dry fenugreek leaves) for 3 cups of wheat flour. Crush the kasuri methi between your palms before adding to the flour.
Using kasuri methi instead of fresh methi is a great option for long distance travel.
Other Methi Recipes to try
Methi Muthiya (Gujarati steamed Snack Recipe with Methi Leaves)
Vendhya Keerai Kootu – South Indian methi dal with coconut gravy
This recipe first appeared on Masalachilli on May 29, 2017. I have updated the post with step by step recipe and new photographs.
Please take a moment to LEAVE A COMMENT and a STAR * rating on the blog. It would encourage others to try the recipe or you could TAG US on any of our social media handles –INSTAGRAM, TWITTER, FACEBOOK PAGE AND PINTEREST.

Methi Thepla Recipe
Equipment
- Tava or Cast Iron Griddle or use non-stick roti tava
- Rolling pin + Board
Ingredients
- 3 cups Whole Wheat Flour Extra as required for rolling thepla
- 1 cup Methi Leaves (tightly packed)
- 2 tablespoon Curd, Yogurt or Dahi
- ½ teaspoon Turmeric Powder or Haldi Powder
- 1 teaspoon Kashmiri Red Chilli Powder
- ½ teaspoon Ajwain or Carom Seeds
- 2 teaspoon White Sesame Seeds
- 1 teaspoon Sugar Read Notes below
- 1 teaspoon Oil for Dough + Extra as required to cook theplas Read Notes Below
- Water to Knead the dough
- Salt to taste
1 cup is 250 ml, 1 tablespoon 15 ml, 1 teaspoon 5 ml
Instructions
- Wash, Rinse, Drain and finely chop Methi Leaves.Keep aside.
- In a bowl, add chopped methi, wheat flour, turmeric powder, red chilli powder, ajwain or carom seeds, sesame seeds, salt to taste and sugar.Mix all the dry ingredients.

- Now add yogurt and using some water, knead the ingredients into a tight dough.
- Rest the dough for 15 to 20 minutes by covering the bowl with a damp kitchen towel or cloth.
- After 15 minutes, add 1 tsp of oil and knead the dough again for 5 minutes until the oil is absorbed by the dough.
- Now divide the dough into equal round portions.Each of the dough is approximately the size of a golf ball.
- Flatten the dough ball, dust it with flour and roll out into thin theplas. Brush off excess flour and prepare for cooking the theplas.
- You can roll out all the theplas and then cook them on the griddle together or do the process simultaneously – your choice!
- Heat a griddle, cook the theplas on both sides by drizzling oil on the sides and in the centre.
- Store the cooked theplas in a hot pot or casserole until you serve so that they are warm.
Notes
- Methi thepla can be packed in air tight container or ziplock bag. It stays fresh under refrigeration upto a week. Heat on a griddle, brush some oil, cook for a couple of seconds on both sides and serve. I wouldn't advise re-heating in a microwave as it turns dry and hard.
- Sugar is added to balance the bitterness from fresh methi leaves. Do not skip this ingredient. This is especially useful when you knead the dough and store in refrigerator to use for a couple of days.
- Quantity of oil is not mentioned in the recipe. For travel, I would advise being generous with oil. It helps increase shelf life. When making thepla for everyday consumption, go easy. I prefer peanut oil or groundnut oil for cooking thepla. Use any neutral oil or ghee, if you like.
Please subscribe to our website to receive all the delicious recipes in your mail box.
We will be back again with yet another exciting recipe .. Until then, stay healthy and happy!
Vidya Narayan
Its an all time favorite! Thanks for the tips. Never thought of wrapping theplas in parchment paper. Have always been wrapping them in foil so far. Point noted. 🙂
I also use curd and milk cream at times to knead the dough. I feel it makes the theplas softer. Gujjus also add a bit of sugar to make it a bit sweet (very little) n salty.
One of my all time favourite gujju snack cum meal. Tastes amazing with curd or even chhunda (gujju sweet pickle similar to moramba)
Loving your recipes as always Vids. Looking forward for more of them