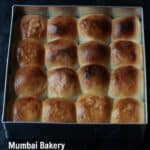
Homemade Eggless Pav
Easy Eggless Bakery Style Ladi Pav Recipe. Mumbai Pav Bread or Indian Dinner Roll Recipe with All Purpose Flour and yeast. Serves as breakfast with butter or jam and a great accompaniment to main course curry or gravy recipes as well. Recipe with tips for beginners in bread baking.
Servings 16 Pavs
Equipment
- OTG for baking
- Square Tin for baking - 9" x 9" Tin with 2.5" depth
Ingredients
- 3 1/2 cups All Purpose flour or maida 1 cup is 250 ml measurement
- 1 tbsp Instant Dry Yeast 1 tbsp is 15 ml measurement
- 3 tbsp Olive Oil + extra as required to grease the pav tin and bowl (for kneading the dough)
- 1-2 cups Lukewarm Water (for kneading the dough - check notes)
- 2 tbsp Milk Powder (optional) Check notes
- 2 tsp Sugar
- 1 1/2 tsp Salt
- 1-2 tsp Butter (salted)
Instructions
- Step 1 - In case you don’t have instant yeast, take active dry yeast of the same qty and proof it. Once yeast blooms, add the mixture to the flour. PS - I prefer using instant yeast in all my bakes.
- Step 2 - Grease a big bowl enough to hold a risen dough with few drops of oil.
- In a separate bowl, add the flour, add salt, yeast (in case instant yeast), sugar and knead the dough using lukewarm water. Add the water slowly and ensure the dough doesn’t get too sticky. Do not add the entire quantity of water while kneading.
- Now place the dough on the kitchen platform or a board and put 1 tblsp of olive oil and knead the dough for roughly 7-10 mins. During the 10 mins of kneading, keep incorporating oil slowly.
- The dough should be very soft to touch after kneading. Now carefully place the kneaded dough in a greased bowl / container for proofing (Step 2) in a warm place. Ensure you cover the dough either with a damp cloth (not wet) or cover the dough with a plate/lid.
- The proofing takes about 1 hour to 1.5 hours depending on weather conditions. The dough should be double in size. Once the dough is proved, knock off the air by punching the dough few times.
- Now sprinkle some flour on the board / platform, knead the dough lightly for 5 mins and make balls of equal sizes, roll them nicely and place them on a greased tin within a gap of 1 inch to rise and form shape of pav for further proving in a warm place preferably for 20-30 mins.
- Preheat the oven before baking for atleast 10 mins (hot oven) at 200 degrees. After the bread has once again risen (2nd rise), brush / spray a bit of milk or water lightly over the buns and place them in the oven for baking at 200 degrees for 20 to 30 mins
- Once baked, brush a butter on top. Serve warm or cool.
Notes
Key Tips to Make Pav At home
- Before you begin, always ensure the ingredients are kept ready at room temperature. If you store your yeast and flour in the refrigerator, remove it and keep out 30 minutes before you begin baking.
- The water should be lukewarm and not hot. Please check this before adding to the flour else it would be a waste. If you are a novice in baking, take a bowl, always add ½ a cup of water, required amount of yeast as per recipe and sugar. Mix and let the yeast proof before adding to the flour. Do this a couple of times before you are confident.
- Quantity of Water – Never add the entire quantity of water as given in any recipe, directly to the flour. Always incorporate it slowly while kneading. Flour depends on weather and while the recipe might say 1 ½ cups, you might actually need more or less depending on climate conditions, the quality of flour too. You will get used to this process once you bake 2-3 breads.
- Kneading – One of the most important step to attain the required softness. Kneading should be atleast for 10 minutes incorporating the oil or butter into the recipe.
- Proofing – Leave the dough undisturbed in a warm place. I often leave the dough with the lid on inside my Microwave oven (do not switch it on) so that it stays undisturbed. Don’t be tempted to lift the lid and check every now and then.
- During summers, the dough rises fast as compared to winters / monsoon so your dough might take 35-40 mins. The dough should be double in size. That’s the only indication.
- The tin used for baking the pav should be atleast 2 inches in height that can hold the shape of pav. Don't bake the pavs in a very flat sheet.
- Distance of 1 inch between the pavs during 2nd proving will allow the pav to rise and then stick together.
- For first timers, it is advised to use milk powder for baking this bread recipe. Eventually you will not need this. Milk powder helps in softness. If you don't have access to it, knead the dough using 50% lukewarm milk instead. Vegans can skip this and bake the bread.
- I have used Square Tin for baking - 9" x 9" Tin with 2.5" depth. It holds 16 nos. pavs easily.